Installing the drain: over wood
The example below is for the do-it-yourself customer. If you're not the fixer upper type of
person, I recommend that you call a plumber.
This example is based on a two inch ABS or cast iron drain pipe and a cast iron drain flange.
Be aware that there are other drain pipe sizes and types of drain flanges out there.
Your circumstance may be different, and this example may not fit your specific situation.
However, the cast iron drain flange used in this example is one of the easiest to install and most commonly
used in Sacramento area for hot tar pans. Also, be aware that Home Depot sells a plastic ABS drain
that has a sticker right on top that reads
"Showerpan Drain". This is NOT the right kind of drain for hot tar showerpans--take it back!
To find the kind of drain used in this example go to Home Depot where they keep the cast iron or metal enamel
tubs--the same isle they keep plastic ABS "Showerpan Drain" mentioned above. In this isle is were they keep
the cast iron NC (no-caulk)
shower drain. (The picture shows one already installed over a concrete floor. Notice the top of the bottom half of the drain is flush with
the floor--this is one of the best examples I've ever seen) The drain comes in two halves and is held together
with three bolts. For a novice it is the easiest to install
because there are no special glues or compounds necessary to make a connection to the drain pipe--it is compression
fit.
As the brass ring inside is tightened, it compresses a rubber gasket against the drain pipe
creating a water tight fit.
If your shower pan is over a conrete slab click here. Otherwise, keep reading. |
|
 |
 |
| 1.
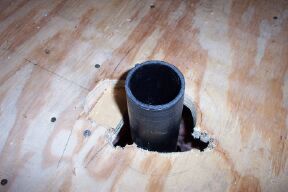
First, determine the center of your pan (sometimes it isn't possible to put the drain in the exact center for
one reason or another--just get as close as you can for esthetic reasons; it usually looks better). Cut a three inch hole then
three notches. Notice in this picture how the plywood is notched around the bolt columns
to receive the bottom half of the drain. The ideal situation is to have
the bottom half of the drain flush with the subfloor, but to do this you need a router or saws-all to hone out the floor.
But you can just set the lip of the bottom half of the drain flange on top of the subfloor as in this example.
|
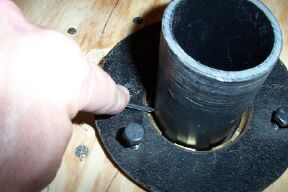
2.
For new contruction, it's best if you don't glue the pipe in until after you determine the right length. Now slip the bottom half of the drain
flange over the pipe until it's snug to the floor. If you have trouble, some plumbers use a little soap to
lube the rubber gasket so that the drain will slip on easier. You may have to rotate the threaded
brass ring
counter-clockwise so the rubber gasket
is loosened just enough to slip the bottom half of the drain over the pipe. Using a nail make a mark flush with the top of the brass ring. |
| |
 |
 |
| 3. Now cut the drain about 1/4 inch below your mark--if the pipe is already
glued in you will likely need someone else pull up on the drain so you can cut the pipe evenly with a Bear Saw. If you don't have help, a drummel tool with a
cutting bit on it works grate too. When using a drummel, I cut from the inside of the drain pipe. The nice thing about a drummel is
you can easily trim the pipe if your initial cut is rough or crooked. Be sure to remove any rough filings or edged after cutting. |
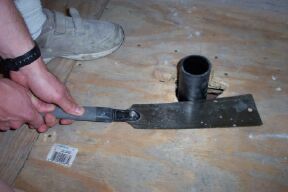
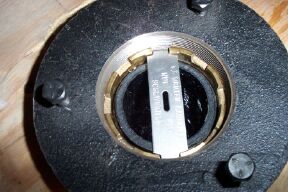
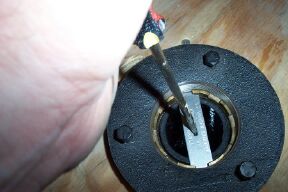
4. These type of no caulk cast iron drains from Home Depot
usually comes with a "key" that fits into the notches around the brass screw to help tighten it. In the middle of the key is a hole
to receive a screw driver. Big screw drivers work the best. If you don't have a "key" you can put the tip of the screw driver in one of the
notches on the brass ring and tap it clockwise with a hammer to tighten it.
|
| |
 |
 |
| 5.
Tighten the brass screw a tight as you can. This may take some effort. Incidentally the screw driver in this picture is a little small for the job. |
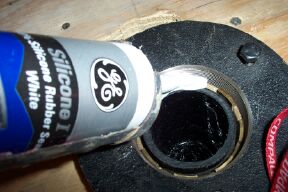
6. This last step is my own precaution. I like to seal the drain with 100% silicon
to ensure a water tight drain connection.
|


